In today’s diagnostic landscape, electrical faults are among the most time-consuming issues a technician can face. Whether you’re dealing with intermittent CAN signals, non-communicating modules, or a mysterious blown fuse, having a reliable wiring diagram isn’t just helpful — it’s critical.
This is where HaynesPro’s VESA™ (Vehicle Electronics Smart Assistant) stands out. VESA doesn’t just show you where wires go — it shows you how to think through the fault, test the system, and fix it faster, with confidence.
In this guide, we’ll walk through how to navigate and apply HaynesPro’s VESA™ wiring diagrams, step by step.
Want to follow along? Start your 7-day free trial of HaynesPro and explore the VESA module yourself while reading.
What Makes VESA™ Different from Traditional Wiring Diagrams?
Before diving into the how-to, it’s worth understanding why VESA™ is such a game-changer for workshops.
Traditional wiring diagrams often present a “flat” view — they show component connections but offer little or no diagnostic context. That means you’re left to interpret the diagram, decide where to test, and figure out the most likely causes of a fault.
VESA™ changes that. It combines OEM-level wiring diagrams with:
- Step-by-step diagnostic flowcharts
- Logical test paths
- Real-time component data and test procedures
It’s like having a built-in diagnostic specialist walking you through the job — only faster, and available 24/7.
Ready to experience the difference? Start your free trial of HaynesPro now.
Step 1: Locate the Fault Using the DTC Search Tool
Let’s say a vehicle comes in with a fault light and your scan tool pulls a DTC — for example, a U0121 (lost communication with ABS module).
Instead of hunting through pages of diagrams, HaynesPro lets you enter the DTC directly into the search bar.
VESA™ will immediately highlight:
- The system affected
- The exact wiring diagram
- The components and circuits involved
You don’t need to guess where the problem might be — HaynesPro gets you to the relevant data in seconds.
Want to test it with a real DTC? Get started with a 7-day trial and run your own code search.
📘 Related read: The Diagnosis Dilemma: How HaynesPro Helps You Find the Fault — Fast
Step 2: Open the VESA™ Wiring Diagram
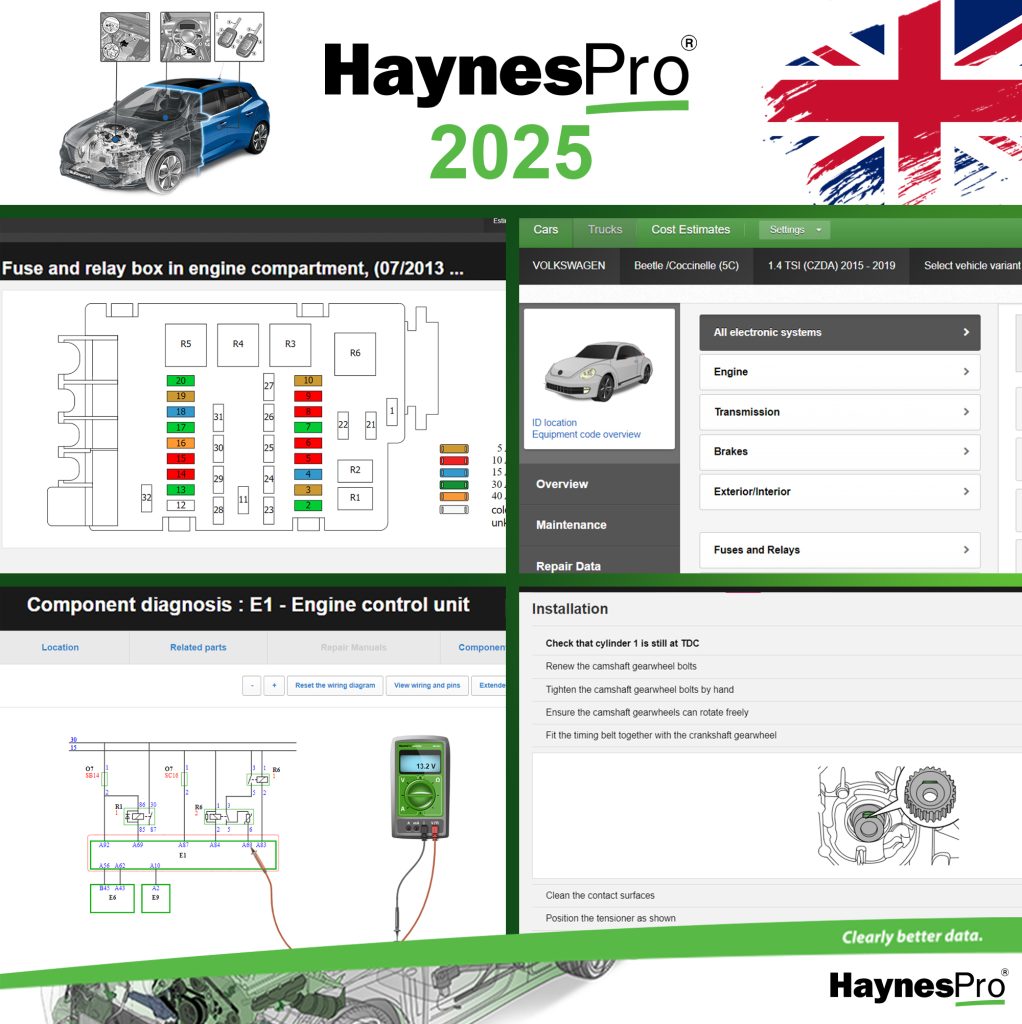
Once you’ve selected the system, VESA™ opens the interactive wiring diagram. This is where the magic happens.
Unlike static PDFs, the VESA diagram is clickable and zoomable, with each element linked to deeper data:
- Click a sensor to view pin data, voltages, resistance values
- Click a wire to trace the path through the circuit
- Click a ground point to see its exact location in the vehicle
Every component in the diagram is interactive — and every link supports a more efficient diagnostic process.
Try interacting with the diagrams yourself: start your free trial here.
Step 3: Follow the Guided Diagnostic Path
Once the relevant system is open, VESA™ guides you through logical diagnostic steps. These aren’t random checks — they follow OEM fault trees, refined for real-world workshop use.
You’ll be asked questions like:
- Is power reaching the control module?
- Is ground present at pin 16?
- Is there continuity between the ECU and the sensor?
Each step includes reference values and test conditions. You’ll know what to test, where to test, and what result to expect.
And if a value falls outside the expected range? VESA™ tells you the next most likely issue to check — reducing diagnostic guesswork dramatically.
Want to see this logic in action? Activate your HaynesPro 7-day trial and walk through a real case.
Step 4: Use Component and Connector Views for Physical Access
Diagnosing electronically is one thing. But accessing the component physically is often half the battle. HaynesPro includes high-quality connector and component location diagrams, so you’re never left wondering where a plug or module is hidden.
For each component in the wiring diagram, you can access:
- Connector pinouts with wire colors and functions
- Visual diagrams of connector shapes
- Exact physical location within the vehicle
No more removing trim panels blindly or chasing the wrong plug.
Experience the connector diagrams and locations firsthand: start your HaynesPro free trial here.
Step 5: Validate the Fix and Reset the System
After making the repair — whether it’s cleaning a corroded ground, replacing a failed sensor, or repairing a broken wire — VESA™ helps you retest the circuit, confirm the issue is resolved, and reset the system if necessary.
You’ll also have access to:
- Reset procedures
- Calibration routines (where required)
- Final checks to validate system health
This ensures every job is completed correctly, reducing comebacks and reinforcing your reputation for doing it right the first time.
Want to test drive a full diagnostic cycle? Start your free HaynesPro trial now.
Who Can Benefit from VESA™ Wiring Diagrams?
VESA™ isn’t just for electrical specialists. It’s designed for:
- Experienced technicians who want to speed up complex diagnostics
- New techs who benefit from step-by-step guidance
- Workshop managers looking to reduce diagnostic time and training needs
- Mobile techs who need accurate data on the go
If your team works with modern vehicles, VESA™ is a practical advantage you can’t afford to ignore.
Equip your team with smart diagnostics: get a 7-day free trial here.
📘 Also check out: How HaynesPro Helps New Techs Level Up Faster (and Why That’s Good for Business)
What’s Included in the VESA™ Module?
When you activate your HaynesPro trial, the VESA™ module is included, along with:
- Full access to interactive wiring diagrams
- DTC integration and SmartFIX/SmartCASE support
- Component locations and pinout data
- Guided diagnostics for multiple systems
- Coverage for combustion, hybrid, and EV models
It’s part of the Electronics or Full Pack module, depending on your plan.
🔍 View the HaynesPro pricing list.
📞 Not sure which module suits your team best? Contact us — we’ll walk you through your options based on your fleet or workshop setup.
Final Thoughts: From Guessing to Guided
In a workshop world filled with complex electronics, HaynesPro’s VESA™ module brings something technicians genuinely need: clarity. No more guessing. No more bouncing between diagrams and manuals. Just structured, supported fault diagnosis — start to finish.
If you’re serious about saving time, training smarter, and fixing faults faster, VESA™ is your next essential tool.
👉 See it in action now — start your 7-day free trial of HaynesPro.
📞 Talk to us about which plan fits best.
💼 Browse our pricing plans.


